I don’t tend to think of myself as someone who ignores privacy settings, but when I actually sat down and spent 20 minutes or so going through Windows 11’s app permissions, I found six things I should have changed a long time ago. None of these require any technical knowledge and is pretty straightforward to check on your own PC. Here’s what I found, where each setting lives, and why it’s worth the 20 minutes.
9 Windows Privacy Settings You Should Change Right Now
Take a few minutes to change these settings and reduce the data Windows collects about you.
Microphone access for apps that had no business having it
Why does a feedback tool need my mic?

The first spot I checked was microphone access. I navigated to Settings > Privacy & security > App permissions > Microphone. Then toggled “Let apps access your microphone” to see the per-app list. The first thing I noticed was that the Feedback Hub had access to my microphone. So did Operator messages, Snipping Tool, Xbox, Google Chrome, Steam, and Zoom Meetings. I turned off access for Feedback Hub, Operator messages, and Snipping Tool.
Sure, these aren’t likely to become attack surfaces anytime soon, but every unnecessary permission is a risk you don’t have to take.
You can also check Recent activity here to see what apps are requesting mic access within the last seven days, which could be useful to catch something you weren’t expecting. The only app in my list of Recent activity is Chrome, and those are all legit.
Camera access you never consciously granted
How to review per-app camera permissions

Head into Settings > Privacy & security > App permissions > Camera to find the apps that have access to your camera. It’s the same procedure as the microphone above: there’s a master toggle, and then toggles for all the apps that might need camera access. There’s also a Recent activity section that shows the last seven days of camera access. It’s worth checking after any major app install or Windows update, permissions can persist across updates and reinstalls.
I found quite a few apps that had camera access, including the aforementioned Feedback Hub. There were also apps like Xbox and Claude that I don’t use a camera with, so those were easy to turn off. Chrome and Zoom Meetings were in the “Let desktop apps access your camera” section, but I left that on because I use the Camera with those apps often. And again, Chrome was the app that requested access over the last seven days, so that’s all as expected.
Location set to “always on” for apps that don’t need it
How to set per-app location permissions

Look at Settings > Privacy & security > App permissions > Location to see which apps are set to “Always” access that don’t need it. Here’s where my settings shined: none of the apps in there have Location access, though I suppose turning it off completely would make sense. I do have Let desktop apps access your location on for Battle.net, a couple of helper apps, Microsoft Edge, Norton 360, and NVIDIA App, so I turned that off completely, too. I haven’t noticed any downsides to doing that yet.
To me, location access really only helps on a mobile device. Sure, if I accessed Weather or Maps on my PC, that might make sense, but for the most part, I don’t need my PC to know where it is, potentially sending that info out to anyone who wants it. Plus, disabling Location entirely on a laptop will help reduce battery drain, as it doesn’t have to continually poll for your location. I left the main Location services toggled ON, because when I went to turn it off, it said that Find my device and automatic time zone would be unavailable.
Background app permissions set to “always” for apps you rarely open
How to change background app permissions per app
The path to these settings is a little different. Head into Settings > Apps > Installed apps > [app name] > Advanced options > Background apps permissions for each app you want to check.
Click the three-dot menu to the right of the app to see the Background app permissions setting.
There are three states your apps can be in: Always, Power optimized (recommended), and Never. The default is the middle one, which lets Windows decide, but some apps can end up set to Always if they request it during an install or after an update. Not every app will have the option to adjust; you’ll have to go through a few to check.
You can also check the battery usage view in Settings > System > Power & battery > Battery usage and sort by the last seven days to see which background apps are actually costing you some juice. Then you can hop back in to Background app permissions to disable if needed.
Advertising ID still switched on
How to disable the advertising ID in Windows 11

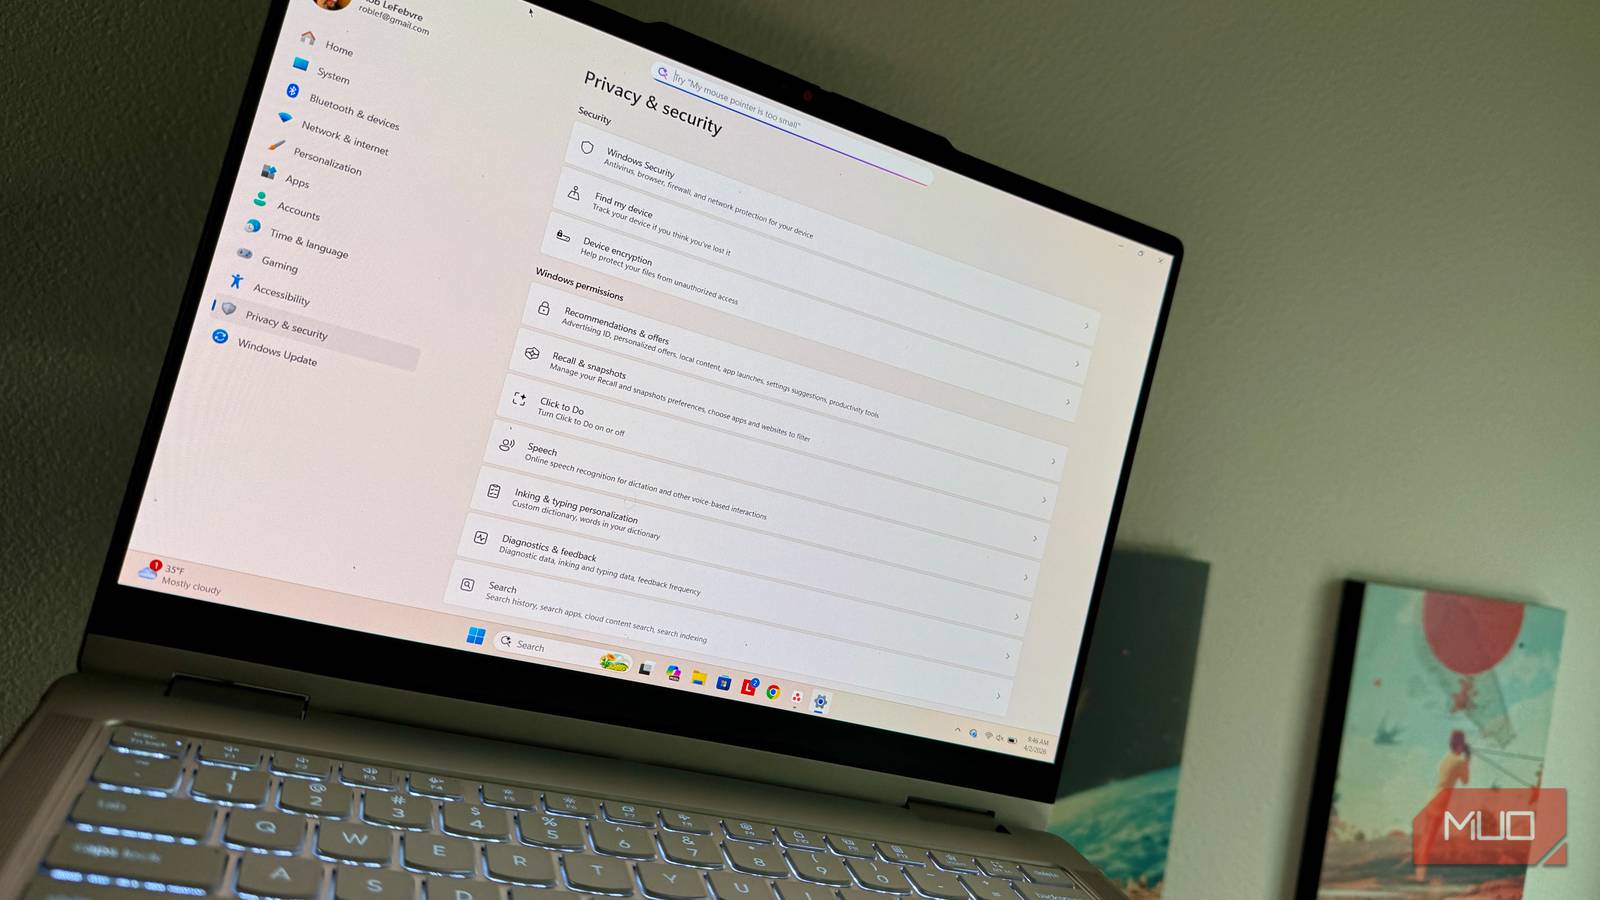
Head into Settings > Privacy & security > Recommendations & offers and check out all the toggles there.Mine were all basically set to ON, so I quickly turned them off. I don’t like Windows spying on me based on my usage, for retail or otherwise, so all of these are an easy OFF for me. I considered leaving “Allow websites to access my language list,” though I turned it off for now. We’ll see how that affects my browsing in the days to come.
Optional diagnostic data still enabled
How to limit what diagnostic data Windows sends to Microsoft

You can check this stuff at Settings > Privacy & security > Diagnostics & feedback to curtail the personal info that gets sent to Microsoft to help them improve their products. I turned off “Send optional diagnostic data” as Windows will already send “required diagnostic data.” Then I found out that Windows Insider Program requires this optional data to be on, so I turned it back on.
You can also drop into the Diagnostic Data Viewer to clear whatever’s been collected before you toggle the “View diagnostic data” off (it uses up to one GB of hard rive space.
That didn’t take too long
Now you’ve got a handle on all the privacy settings via a quick audit that doesn’t take much more than 20 minutes or so. Opening each panel, reading through the app lists, making decisions about each toggle is worth your time, though, as it will keep your data private and let you control how much you share with outside companies.
[ad_2]
Source link